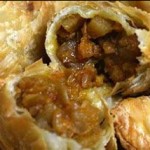
Would you love the juicy curry potatoes in the curry puffs of the 60s and 70s ? Well I do …
Would you love the chunky curry chicken pieces in the curry puffs of the 60s and 70s ? Well I sure do too …
The easy way to have good curry puffs, ONLY if you reside in Singapore, call my friend Mr Ting at 91470462, he delivers free if you give him a big order … 🙂 seriously he does a pretty mean puff and I do not get a commission, just sharing a good puff that I found.

Today’s curry puffs have gone in many directions and varieties, haven’t they? We have some who have factorize their operations … by factorize, I don’t mean the mathematics kind, I merely borrowed the pun for referring to the factory production process of most of my favorite snacks of the 60s and 70s.
There is nothing wrong, I guess with ‘factorize’ IF, and that would be a BIG ‘IF’ they had kept up with their quality. I like mine with a balance aroma of curry spices and juicy fillings. Most of what I could now find are usually rather dry on the inside; either because they are not fresh or the new production process had altered their original flavors.
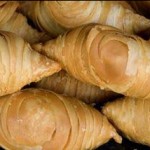
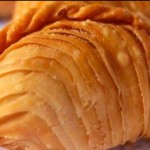
One new thing I do like, of today’s curry puffs are the layered crispy skin style. I know some traditional folks out there would prefer the non layered version, nothing wrong with that I guess, but I did modernize my taste preferences over the years.
Well if you are craving for some good curry puffs, ONLY if you reside in Singapore, call my friend Mr Ting at 91470462; Hmmm … this does seem like an advertisement doesn’t it … ha ha ha.
There are many receipes on the web and I am sure you can find better ones, but well, here is one if you would like to try to do it on your own, it is not simple, if you want a good curry puff, you have to put in the effort or call … okay not more jokes, here we go, how to make curry puffs:
For the fillings:
170 g diced chicken meat in 7 mm cubes – I like to use thigh meat, you can use breast meat too.
230 g diced potato in 5 mm cubes – I like the local Asian potatoes which are less mushy.
A few pieces of curry leaves (5 will do)
3 tablespoon of thick coconut milk
30 g diced carrot in 5 mm cubes
A stalk of crushed lemon grass
3 tablespoon of curry powder
A dash of sugar and salt
30 g chopped tomato
170 g minced garlic
A cup of water

For the skin dough:
Inner layer oil based dough:
150 g of a good plain flour – if you could get the Japanese kind, that is the best.
70 g of Golden Churn Butter
Outer layer water based dough:
370 g a good plain flour
170 ml hot water
50 g margarine
A dash of salt
How do prepare the curry puff:
Curry Puff’s Filling:
Marinate the diced chicken with curry powder and a little salt (you can skip the salt if you want a healthier puff).
Warm up the pan with a little oil. Make sure the heat is not too strong, if the oil starts to smoke that is too hot. Once ready, throw in the minced garlic and stir till fragant – do not over cook the garlic else it will turn bitter. Now you can add in the lemon grass, curry powder and curry leaves. Depending on your heat setting, stir fry the mix for less than 3 minutes – remember not to burnt the mix.
Diced carrots, potatoes and tomato can be added into the mix now and stir fried for about 5 minutes; watch the potatoes, you want them cooked, not mushy. Add a bit of water if the mix is too dry, you need the mix to be like a paste.
Now is the time to add in the chicken, you don’t want to overcook the chicken as it would turn rough and tough, especially if you are using chicken breast or fillet meat. Have a taste of the paste and if you really want to add a dash of sugar and salt.

Once the chicken is done, the last thing to go into the mix is coconut milk and cook for another minute. The mix should be in a paste form else you could have added too much water earlier, you will then have to cook it a little longer to dry off the mix which could overcook the chicken.
When done, you can set it aside to cool. This paste can be pre-prepared and left in the fridge.
Now for the skin dough:
Outer layer water-based dough:
Bring the water to a boil in a pot, add in the butter and a dash of salt if you want. Turn off the heat and add in the floor. It is hot, so get a spatula and mix well and when it is cool enough, knead it till smooth. If the mix is too dry, it will not be smooth, add a little water and knead till smooth. Divide it into 9 parts and set it aside while we work on the oil-based dough.
Inner layer oil-based dough:
Mix the butter and flour well and divide into 9 roughly equal parts. If you like to, you can also add an egg to the dough mix for extra flavor; before you divide it.
Now we are ready for the final steps:
Take one part of the oil based dough and wrap it with one part of water based dough. Flatten it with a rolling pin, you can also use a water bottle if you don’t have a rolling pin. Roll it flat roughly into the size of a 4R photo, then roll it up like a carpet and flatten and roll up and flatten one last time; Try to flatten it into a circle shape as best as you can. It should be about the size of a 4R photo but round in shape.
Scope the paste into onto the skin dough, making sure you fill up half the circle and be carefull not to let the paste go onto the edge of the dough, you need about a 7 mm edge around the dough so that you can close the puff with a good seal. Now fold over the other half circle of the dough over and seal the edge by pressing down with your fingers.
To get a really good seal you need to fold the edge with a pattern. Start by holding the semi-circle puff on your left hand (I am right handed so you need to reverse this if you are left handed). Using the right hand’s thumb and first finger and starting from the right most edge, press the edge to flatten it. You would now have a semi circle puff, with the right most edge flatten like a coin shape sticking out. Now place your thumb below this coin shape flat, halfway forward towards the left and bring it up and over to the forward edge towards the left and again flatten it. Repeat this till you reach the far left end of the puff. You would get a nice wavy edge and if you had been careful not to let the paste onto the edge, this will ensure that the edge won’t open up when you fry your puff.
Repeat the above for the remaining 8 parts.
If you have one of those modern electric frying pots, that is nice, you can fry the puffs till golden brown. If not find a pot and put in oil, enough to over the whole puff, so it would be good to get not too big a pot and you probably need oil to fill about 50 mm (2 inch). Heat up the oil, moderately, not let it smoke (too hot). You can try and put in a wooden chop stick into the oil, if you can see tiny bubbles coming up from the sides of the wooden bubbles, that is hot enough. Place in the ready puffs and fry till the skin is golden brown. Remove to cool and serve warm.
If you have read till here, thanks for your interest and go get the ingredients and have a go, but if like me, you realise that this although may not be rocket science, but you have better things to spent your time, well, you already know it … a easy way to have good curry puffs, ONLY if you reside in Singapore, call my friend Mr Ting at 91470462, he delivers free if you give him a big order …
Ok, I stop here … ha ha ha … I’m going puff, poof, puck …
